Tuesday, November 15, 2011

Tuesday Tour: Chulamama's San Francisco Digs

There's a new mom at school.  She goes by Noelle, and we hit it off from the get-go. We both love to joke around, ride our bikes around town together, and gab about fashion and decor. Noelle's also a DIY girl like me. When she told me how she ripped all the wallpaper off her recently purchased home in a matter of weeks, I knew we'd become fast friends.  Our first play date together was to Scrap.  She's my kinda girl!


She and her business partner Heather run a store called Chulamama-- "cool mom" in Spanish. They sell maternity clothes, baby clothes and baby gifts for the modern family and stylish pregnant women. The physical store is just North of Boston in Danvers, MA.  


Noelle is on the left and her biz partner Heather is on the right


And this is Chulamama!
Chulamama was a hit right out of the gate, winning "Best of Boston" the first year they opened!  


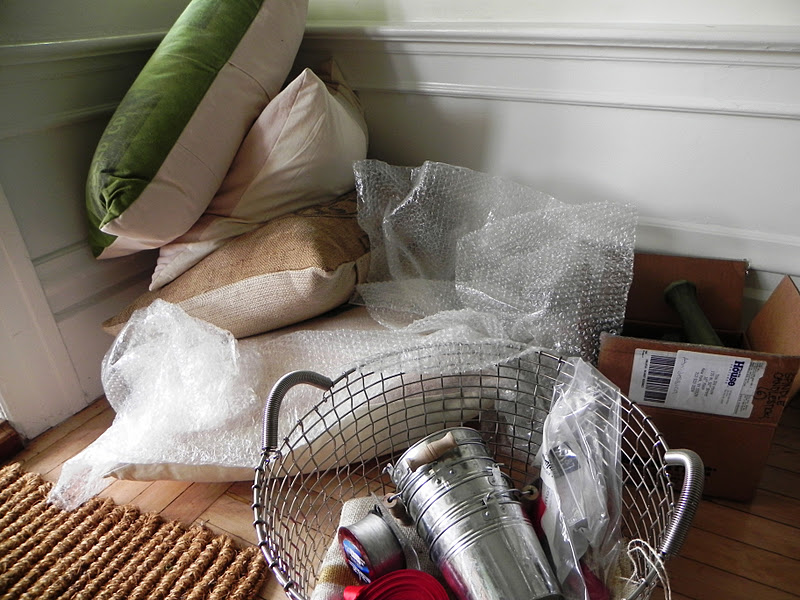
Today Noelle finally invited me to her new San Francisco home. We had an ongoing joke about not allowing me inside until her fabulous new Dwell rugs arrive. FedEx came today and so did I. Of course I knew to bring my camera!  Our kids played together in the backyard while Noelle and I oohed and awed over the new rugs and all of the projects she did around the house in just three months.


Noelle and her husband Ben and their two adorable kids, Jake and Jude, live in a 1920s three-story home by the beach with mid-century modern decor. The first thing I noticed when I walked in was this fabulous old movie projector flanked by two gorgeous Kenneth Wingard table lamps on a beautiful modular case called "3 wide" by Nurserworks.  All I could think was, "This chula mama has been holding out on me!  Forget the Dwell rugs.  There's so much more to see!"


Instead of centering the area rug with the entryhall she casts it to the side creating a cozy seating area. 


The rug is Avalisa and the chair is Herman Miller and the coffee table Offi. Noelle won the photo at an auction and is by a local Boston photographer


When you walk upstairs to the main living area you are greeted by the fun and dramatic dining room. 


And there's the rug we've all been waiting for!

The warm and inviting wood table is one-of-a-kind, sold by In Home Furnishings.  Noelle's hubby, Ben, sanded the top down to lighten it up and left the legs dark. The hip and totally kid-proof orange chairs are from Herman Miller. And the rug Noelle and I have been waiting for is right at home under the table. And yes, it is to die for! The stunning wall of mirrors on the wall is from Kenneth Wingard. Noelle's finishing touch here is the bright orange door to the kitchen. How fun is that!


View in hallway toward living room and you see the hint of stairs which lead up toward the bedrooms

Noelle's avocado green leather sectional from Arhaus reminds me of my morning kale shake! It's such a refreshing change from the expected living room furnishings. It's super comfy to sit on and provides a lot of seating without encroaching too much on this fantastically large room.  What a great piece.


Blu Dot Blockoid Vegan Leather Ottoman accompanies the sectional
With a stunning view out the window of the Pacific ocean, Noelle created a comfy little nook in this corner of the room.  The coveted Eames chair and ottoman sets the stage for luxurious comfort and sophisticated style.  Noelle loves to sit here with her lap top and work on her web site while gazing out the window at the surf. Who wouldn't?! This is one of my favorite vignettes in Noelle's beautiful home.  And how about that amazing yellow lamp!  


Noelle found this yellow lamp at Kenneth Wingard (It is the same lamp featured in Rachel Zoe's house!) Of course Noelle wanted two but they were sold out and something went wrong with production so that was going to be it.  At least she got this one!


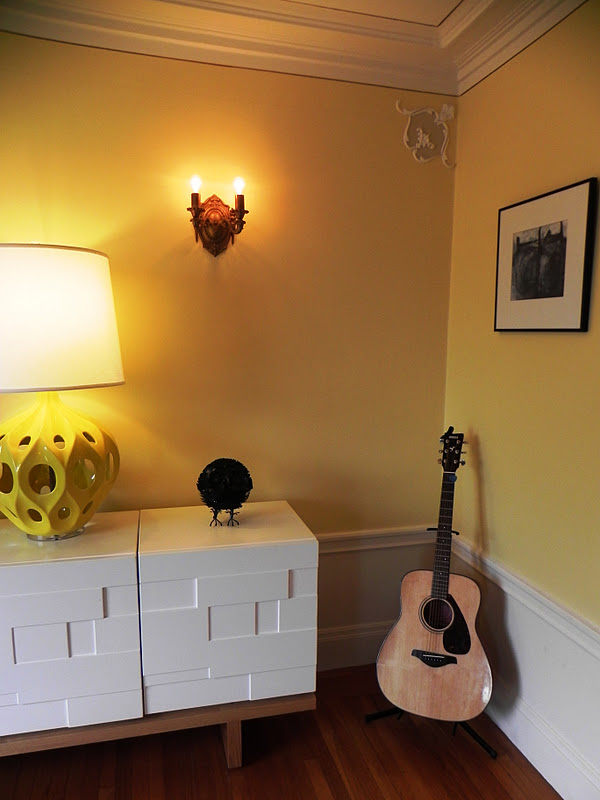
Ben is taking guitar lessons.  I love having musical instruments in the home.  Even better if someone is playing them!  
Look at that face.  The owl is from Kenneth Wingard

I love this vignette too!  Noelle creates perfect symmetry with this wall, even down to  the pillows in the floor baskets.  So pretty.
The sleek cabinet shown above, under the TV, is an original by Ben!  Noelle fell in love with a similar piece but of course it cost a fortune and was out of stock.  Ben took one look at Noelle's coveted piece and said he could whip one up in no time!  What a hubby!

Ben made this lovely cabinet out of pine and used a no-VOC water based stain on the wood, which he rubbed on by hand.  The white pieces you see are actually metal. Ben knew just who to call to create these custom aluminum sheets that he had bent just right so they would slide into the grooves of the cabinet.  And they do slide smoothely.  I tested them myself!  Ben acid etched the aluminum and sprayed on a white paint.  Of course he finished off the piece with reclaimed oak for the legs. 

Ben's dad was a master carpenter.  Clearly, Ben's carpentry skills are in his genes, but really, who's husband does this kind of stuff anymore?  Not too many husbands in the city that's for sure!


Love these chairs from Herman Miller.  The pillow is from Gina Triplette.

Noelle's twist on an old "came-with-the-house" fixture
Instead of investing in the costly purchase and installation of 6 new wall sconces Noelle cleverly worked with what she had been given.  She removed the shades and other adornment that didn't mesh with her look and popped in stylish Edison bulbs.  Such an inspirational approach to re-thinking what she already has. They're perfect and uniquely her own! She's so talented! I just love when something old gets a new life!

Noelle took the same approach to the kitchen as she did with the light fixtures-- doing the best with what she's been given.  She painted the top cabinets white and the bottom a buttery yellow.  She definitely capitalizes on the "less is more" notion in the kitchen.  Everything she has in this room has something to offer.


She takes everyday staples like gold fish and straws for the kids and displays them in canning jars.  I noticed it right away and love it!

She popped in simple new cabinet pulls and brought in punches of red with her Le Creuset cookware.

Noelle likes the look of magnetic spices so she created her own!  She purchased these tin cans from Specialty Bottles, placed magnets on the back and spice stickers on the front she made with a label maker.

There's the orange door again...and her Boston Marathon Bib framed.  It adds a fun pop of interest.  This is another great vignette!

...Let's go upstairs. 

Even the guest room is smothered in style.  The bed with pull out trundle is Argington.  The antique dresser is from In Home Furnishings.  I love the over-sized shade on that fat little table lamp from Kenneth Wingard and the fur ball rug.


The beautiful blue painting is something Noelle painted in 5 minutes to add some color!
Jake and Jude's funky and fun bedroom is painted with Behr Paint Ultra "Moss Print."  I love the clean lines of the metal bunk bed and those bright blue comforters are so fun!

Duro Hanley Full-over-Full Bunkbed with West Elm Organic Sheets & Ralph Lauren Aqua Sheet Blankets

Even the lucky kids in this home get to enjoy a stylish "3 Wide" modular case by Nurseryworks in their hip bedroom.  Chula kiddos!
For some reason, with all the hip, clean lined decor in this kid's room, the kid's clutter on the floor doesn't seem so bad! Hmmm....
Ben made this awesome surf board to decorate their room.  
Noelle and Ben's master suite is so calming and pretty.  I love the purple and gray colors.  But as you can see below, Noelle is far from matchy-matchy.  She also brings bright pops of yellow into this room and it works beautifully, adding some sunshine to this soothing room. When you live close to the beach in San Francisco, it's not all sunshine!

The master bedroom has views of the Pacific.  The gorgeous chair by the window is where Noelle and Ben enjoy those views.


The 1960s vintage desk is the perfect size with so much character.  The fab yellow chair is Vitra T-Vac  

And, there's the Dwell rug again.  When Noelle finds a piece she loves, she goes all in.  She often buys two or sometimes three or even four of what she loves and sprinkles it throughout the house.  

Noelle is passionate in all that she does and it shows through in her beautiful San Francisco home.  They've only been in this house for three months and it looks amazing.  Knowing Noelle, there will be many more changes to come.  I'll keep you posted!

Thanks Noelle (and Dwell) for letting us inside your fabulous family home!

Thursday, November 10, 2011

DIY 1-2-3: How to Create an Affordable, Industrial Wine Crate Shelf

I have been collecting wine crates for a while now.  

Miller Pelaez after remodel
Our wine crate end table shown in This Old House Magazine. Photo by James Carriere
I pick them up from wine shops for a few dollars per crate. They have served as filing cabinets, end tables, storage bins for tiles, junk bins, recycling bins, recipe boxes-- you name it. I put label pulls on them to remind me what's inside.  

Until now I haven't figured out how to arrange them in a practical way.  I usually just stack them.  So, of course, when I need something, it's always at the very bottom which is annoying to get to.

My wine crates before I created a new solution
So, I had a cabinet maker give me a quote for using my wine crates as drawers and turning them into a dresser.  Something like this image below...

I was considering having something like this made but with an unpainted frame and far less wine crates
To make a simple box with 8 existing wine crates as drawers would cost $1,000. The drawers are tiny so I wouldn't get that much storage space out of the custom dresser.  That didn't seem worth $1,000.  I considered making my own dresser using some old doors as the frame but I wasn't sure I wanted to spend the time to pull that off. 

I considered buying the right sized dresser and then replacing the existing drawer fronts with my wine crate fronts similar to this dresser pictured below.

Cute re-do of an old dresser

I actually love the dresser pictured above, but I thought it would be wasteful since I'd have the rest of the wine crate box to deal with, plus I'd have to source the right sized dresser which would take time.  I wanted to finish this project NOW... Then, it hit me!


Why not stack them but allow enough room in between to grab what's inside.  I needed some way to frame the brackets, suspending them a few inches from each other.  I needed something like a corner bracket typically used in the garage. 

I found these 4 foot long by 1 1/4 inches wide galvanized metal brackets with pre-set holes at a local Ace Hardware Store (Cole Hardware). These are called "Angle Slots" from Hillman (Steel Works) SKU # 5216437.  They were about $13 each and I needed 4 for my stack of 4 crates.  


The only problem I ran into was the finish.  Many of the brackets were powder coated in a grayish paint that didn't look good.  I wanted raw galvanized steel.  I had to special order some and only 1 out of 8 came with the finish I wanted.  Since these typically aren't used for display, there is no guarantee on the finish.  The manufacturer just makes them out of whatever they have on hand and doesn't worry about the look.  

Fortunately, the nice guy at Cole Hardware cut a few taller brackets with the right finish down to 4 foot lengths.  I also had to purchase a box of 100 flat washers to cover the large pre-drilled holes in the slots, and a box of 100 1/2 inch phillips head wood screws.

Here's how I made them.  The project took about an hour or so once I had all the materials in hand.

Step 1:  Arrange the crates on the floor with the angle slots resting on the side corners of the tops of the wine crates. The angle slot is positioned about 1/4 inch from the top of the top crate and 1/4 inch from the bottom of the bottom crate.


Step 2: Place the washer over one of the holes in the angle slot then drill the screw in slowly using a drill.  I did not pre-drill the holes since the screws were small and narrow. I tied to maintain a pattern for drilling but had to be careful not to drill into the existing nails used to build the crates.  I drilled between two and three screws into each side of each wine crate. I applied moderate pressure and drilled slowly so the flimsy plywood didn't crack.  


Step 3:  Once the top and bottom crates are attached to the angle slots, I lined up the next two crates and measured the distance between the crates so that all the crates were equidistant apart.  Then I drilled those in place.  I repeated the drilling until I went all the way around with angle slots secured in each corner.


One word of caution:  As I drilled each angle slot in place, I noticed it got harder to tighten the fit between the angle bracket and the wine crate.  At times, there was a big gap so I had to apply pressure to close the gap.  Sometimes I had to use a longer screw for the pressure to sink in.  Try not to crack the plywood.


Here's the finished shelf.  Not bad for around $80!
To give it a more finished look and for ease of moving, I added chunky industrial wheels to the bottom.  I found these for $6/piece at another local hardware store-- Discount Builders Supply.  They have tons of different wheels. I also saved the plywood tops and placed them on top of each crate to hide what's inside. I just lift them up to grab what I need.


I actually built two of these.  Each crate houses something I need to get to once and a while:  Recipes, Flashlights & Batteries, Maps, Cards & Stationary, Appliance Manuals, Wallpaper Samples, Light Bulbs and Receipts.


I hope you enjoyed my latest 1-2-3 DIY project!  Happy organizing!

Sunday, November 6, 2011

Fall in Love with Laurie b

My girlfriends Lily, Kelly and I met up in Union Square to shop Laurie b's Fall 2011 line last month.  What a treat!  Laurie b herself (Kelly's bestie) presented her lovely wares to us one-by-one.  Her style really resonates with me. If my house were a clothing line, I think it would be Laurie b!

Kelly wearing one of my favorite sweaters (sold out!) & the fashionista herself, Laurie b


If you don't know Laurie b, you're in for a treat.  Her sweaters are cozy and casual but totally unexpected.  Many are flowing and feminine but have fabulous asymmetrical lines to bring in just the right touch of funk.  She is the queen of details.  Little stitching on the sleeves, ribbons that tie in back, layered textures and color.  I feel so artsy when I wear Laurie b.  I can't tell you how many times I've been stopped on the street by a stranger telling me how much they love my... Laurie b sweater!  


So many of her knitwears can be worn in several different unique ways, depending on your mood.  Laurie dressed each of us and showed us how each piece can take on a new look.  She even has hidden snaps inside the garments!  I joke around with her that her clothes need to come with instructions because I forget all the different ways to wear them!


"Kelly-- take notes on this. I'm not going to remember how to ensemble this at home!"

Being 'dressed' by a designer is so nice.  It's like getting your hair done, only better!

Laurie b has so many fine details in her clothing, and the yarns--  straight from Italy-- are to die for.  They are so soft and luxurious.  She has cashmere-cotton blends, merino wool and alpaca and linen sweaters. Delish!  I want to sleep in them!  Speaking of which, when is Laurie going to start a line of home goods?! (Her taste and talent in home decor is as wonderful as her talent in fashion!  Many of her clothing line photo shoots take place right in her home!)


Lily has a hard time choosing.


Laurie placing our order.  It's not that hard, Laurie.  We'll take them all!

Is this the cutest thing?  A ballerina sweater with a choker built-in!  
The Winner from Laurie b. knitwear Fall 11 line.
All three of us bought one of these "The Winner"-- clearly!  We will be living in these this winter!
The Yearling from Laurie b. knitwear Fall 11 line.
I couldn't resist this basic.  I have so many sweaters to layer on top of this


Studio Cape from Laurie b. knitwear Fall 11 line.
I bought this sweater, "Studio Cape"-- Love it!  

You can find Laurie b at Bloomingdales and Nordstrom as well as hundreds of boutique shops, including Dema in the Mission.  Thank you Laurie for dressing us so we can look fabulous this fall!

Tuesday, November 1, 2011

Coveritis Comes to Life-- We Made the Magazine Cover!


Coveritis-- noun.  The affliction of constantly fluffing one's home to make it worthy of being on a magazine cover-- at a moment's notice. [Source: Cote de Texas & The Inspired Room]

Magazine Image
This is our dining room!
The same day I opened a stack of This Old House Magazines in the mail featuring our whole house remodel, I received a call from the editor requesting another shoot.  I kept thinking I really don't have anything else to show you guys!  I found out they wanted to re-shoot the dining room to... (gasp) try for a cover shot!


Still confused about why my dining room would be worthy of a magazine cover, my Mom explained that they probably wanted to decorate it for the holidays.  Duh!  My "moment's notice" came.  They were coming back to the house in 3 weeks.  Christmas in September!  They're going for the cover!


I knew better than to fluff anything though.  They were going to clean out the cupboards and start from scratch.  We were just providing the shell.  Several days prior to the shoot, my porch was stacked with boxes. Tom, our UPS guy who happens to live on our street, was wondering what we were up to now.  "Aren't you finished with this house yet?" he asked.  Apparently not!


I unpacked boxes of pillows, ribbons and canisters... Frames, silverware, dishes and candle after candle after candle.  They even mailed six live rosemary plants and an area rug.


It was fun to get a head start on our holiday decorating ideas.  The only down side was that all of it was going back-- with the exception of the rosemary plants and flowers.  


We were thrilled to learn that James Carriere, the photographer who did our first magazine shoot was coming back.  


James has such an eye and always puts us at ease.  Nothing seems to bother him.  He's a get-it-done kind of guy, even when the pressure is on, and there was a bit of pressure on this shoot. 


We had a new stylist-- Sarah Alba who came in with a trunk load of wares above and beyond what was already shipped to us.  It really did look like Christmas!
Sarah and her bags of holiday decor!  She is amazing at arranging flowers.
The biggest change to our dining room was the placement of a large area rug.  It definitely offered a more country feel to the home, which we weren't used to, but liked how the rug color brought out the warm orange tones of the cabinet doors and dining table and chairs.
There were countless versions of the table design, and the fireplace design as well.


The editor asked James to take this angle as well as a head-on shot but he knew this photo wouldn't make the cut.  A lovely shot but not a good fit for the cover.  James explained that not only does the picture itself have to be appealing but it also has to work around the text on a cover.
Here, James is comparing notes on what the different magazine staffers were asking him to do.  There were a lot of cooks in the kitchen that day!  "Go this way...No that way...Move this...Move that...Back over here...No over there..."
...So, there were several different layout tryouts for both the table and the mantle, and the overall direction of the shot.
The editors moved the dining table to the left so the fireplace could be seen in the photo.  They wanted us to light a fire but we explained this is a 100-year old coal burning fireplace.  We can't burn a fire! This seemed like something This Old House should know already :)
Believe it or not, we were 8 hours into the shot at this point.
James is worried because the light was starting to pour in.  We didn't have much time left to take the photo.


James covered the glass doors to control the light.  Tick tock!


Running out of time, James is trying to figure out how to hang the wreath.  It has to be just the right height to look just right in the photograph.
So this was the final shot that made the cut.  From this...
Magazine Image
...To this (plus a photo shopped fire and cabinet doors). All-in, it was a 9-hour day. That's what it takes to make a magazine cover!  We're thrilled to be on the cover but can't imagine it will ever happen again!  

Thank you This Old House for taking such an interest in our home!  The November/December 2011 issue is on the news stands now with crafty, easy, DIY ideas for getting your home ready for the holidays.  Happy holiday decorating!